


In my last article, I shared with you a WooCommerce tutorial with the help of which you can create your online store within 45 minutes!!! Also, I discussed how WooCommerce allows its merchants to extend the core functionality. Yes, with the help of WooCommerce plugins, you can add or enhance the functionality of your online store.
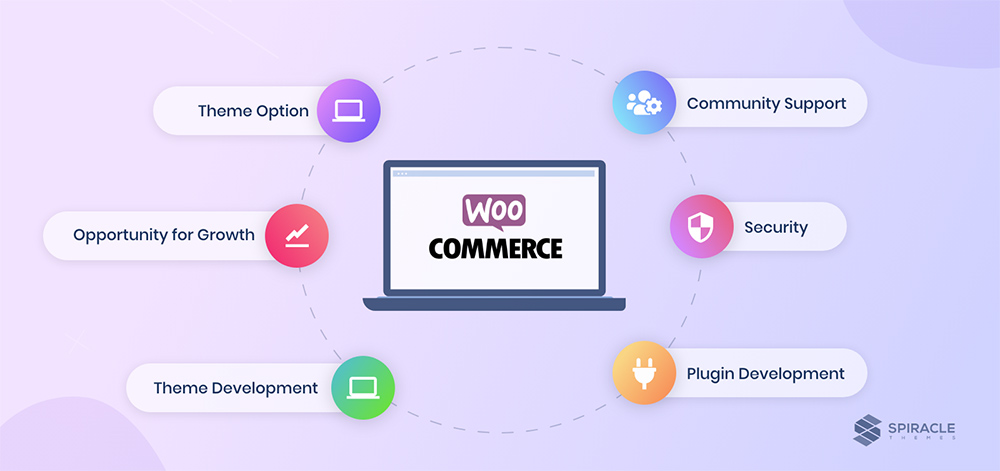
WooCommerce is a complete eCommerce solution and that too for free but creating an online store is a very personal endeavor. The plugins have a very important role in this.
A plugin is nothing but software that contains a group of functions and can be added to your WordPress environment. As a result, you can add desired functionality to your website.
While there are millions of free and premium plugins already available online, still you can contribute to the eCommerce community by developing a custom WooCommerce plugin.
This time I’m back with another tutorial, and we’ll learn how to create a WooCommerce plugin from scratch.
Ready To Create Your WooCommerce Plugin From Scratch?
- Basics Of WooCommerce Plugin Development.
- Benefits Of Creating A Woocommerce Plugin
- Why Consider WooCommerce Plugin Development?
- 9 Best Practices To Create A WooCommerce Plugin
- Prerequisites To WooCommerce Plugin Development
- Guide To Create A WooCommerce Plugin From Scratch
- Best Marketplaces To Sell WooCommerce Plugins
Basics Of WooCommerce Plugin Development
Just like other plugins that operate on WooCommerce are also built upon WordPress. Thus, if you have a fair idea of WordPress extension development you’ll be able to create a plugin for WooCommerce as well. The only difference is that WooCommerce provides a set of features that as a developer you can use and extend to build solutions for online sellers.
WooCommerce extensions use WordPress hooks to modify the behavior of WooCommerce, making it a flexible solution for e-commerce. To say this, you have to be well familiar with the WordPress hooks. Let’s see what are hooks and how they work in detail. For developers who want to keep up with broader eCommerce and software development trends, Chicago Tech Viewer can be a useful resource alongside hands-on WooCommerce learning
What Are Hooks In WordPress?
Hooks are the medium by which one piece of code interacts with another piece of code at specific spots.
This lays the foundation of the working of WordPress plugins and themes. To say, hooks are the words with which the plugins and theme communicate with each other and affect the functionality of one another.
We have An In-depth Guide On Hooks.
There are two main types of WordPress Hooks:
- Actions: The action hooks let the developers change the way a request is handled by WordPress.
- Filters: Contrary to actions, filters modify the data and pass it back to WordPress for further processing.
Since WordPress allows developers to create their hooks, therefore, WooCommerce has created its hooks to serve some specialized goals. While developing a plugin you have to keep hooking between the WordPress and WooCommerce actions and filters to knit your code.
Here’s the complete documentation for WooCommerce hooks: WooCommerce Hook Reference.
There are hundreds of actions and filters available, therefore when building an extension it can be challenging to decide exactly which one to use. The best way to begin is to start considering the Critical Flows.
Critical Flows represent the most common actions that a merchant and a customer tend to take while interacting with an online store. WooCommerce critical flows account for a majority of typical activities in a WooCommerce store.
Note: While Critical Flows account for the majority of the important activities of a WooCommerce store, they do not represent the extensivity of WooCommerce.
Benefits Of Creating A Woocommerce Plugin
Creating a WooCommerce plugin has several benefits for customers, developers, and business houses alike. Some of the popular benefits of developing top WooCommerce plugins are,
- WooCommerce plugins allow developers to extend WooCommerce functionality beyond its core features. They get a chance to customize as per the requirements of their businesses.
- If your wcplugin (WooCommerce plugin) is unique and valuable you might get a chance to monetize it. This can be done by selling it directly or by providing premium or free versions of it.
- These plugins can also help you to integrate WooCommerce business with other services and business tools. This can include accounting software, CRM solutions, email finder tools and shipping services, which further streamline your business.
- Well-designed plugins also help with SEO for your WooCommerce stores, as they help with enhanced organic traffic and visibility of your online store.
- Developing your WooCommerce plugin offers the advantage of scalability and flexibility, enabling you to adapt and expand your online store as your business grows.
- If you want your store’s look and user experience handled by specialists, our custom web design services can help you turn your WooCommerce setup into a high-converting storefront.
Why Consider WooCommerce Plugin Development?
WooCommerce plugin development can be considered to meet unique customization or dynamic needs/requirements, offer distinct features, and align with specific business workflows, which ensures brand consistency and optimal performance of businesses.
Custom plugins provide the flexibility to integrate seamlessly with third-party systems, adapt to scalability requirements, address security concerns, and capitalize on monetization opportunities.
Further engaging in wcplugin development not only allows businesses to stand out in a competitive market but also fosters community visibility, collaboration, and the ability to stay abreast of evolving industry trends, ultimately contributing to a more robust and tailored e-commerce experience.
9 Best Practices To Create A WooCommerce Plugin
Being an open-source platform WordPress is highly extensible. As a result, it makes it possible for the developers to build plugins in several different ways. But there are some best practices that you should consider to give merchants a seamless experience when they install your plugin.
Here are some basic principles that you can consider in your quest to create a WooCommerce plugin:
1. Determine Your Plugin’s Purpose
Before you start developing a WooCommerce plugin it is crucial to evaluate its purpose. Ask yourself questions like,
- Why are you developing this plugin?
- What problems will it solve?
- Are there other plugins, that are capable of tackling these problems?
- If there is, then how will you make your plugin different and amongst the top WooCommerce plugins?
Once you have the answer to all these questions. Then ask yourself a different set of questions. These questions might determine the functionality of your plugin. The WooCommerce developer should be 100% sure of the plugin he is about to develop.
2. Ensure To Namespace Your Plugin Properly
Make sure that you namespace all your files, classes, functions, and variables with your WordPress plugin name. So say, use proper prefixes for all your functions and variables to avoid conflicts and confusion with other plugins and themes.
For example: my_plugin_some_function(), my_plugin_my_variable.
3. Use Third-Party Libraries
Developing a WooCommerce plugin is no doubt a time-consuming process. So, it becomes even more important for developers to try and minimize the time. You can do that if you decide to use third-party plugins or leverage modern AI coding agents to accelerate development. An AI writer for bypass detection can be similarly used in academic contexts to enhance writing processes, making it easier to avoid plagiarism detection tools. This will not only significantly reduce cut-down time but also help you to avoid errors.
But this comes with its disadvantages, the WooCommerce developer will have to be very careful. It is advised to read the instructions thoroughly before proceeding. These instructions are readily available in the documentation provided by these libraries. It is also advisable to use namespaces, for instance, to avoid naming conflicts in the future. The developers should also refrain from utilizing unsafe or outdated functions. It is recommended to give the due credits to the provider and provide necessary mentions in the WooCommerce WordPress plugin description, as a token of appreciation.
4. Render White Screen Of Death For Public Users
Public users might try to directly access your .php files through your users. If your file contains some I/O operations consequently, it will be triggered and end up in some unexpected outcome.
Use the following snippet to execute your plugin files only in the WordPress environment and the files .php are inaccessible to public users:
5. Define User Roles And Capabilities
In WordPress users are defined by their roles and each role is distinguished by capabilities. Roles define the users’ capabilities and limitations for accessing the data of your Woo plugin WordPress.
6. Immersive WooCommerce Admin Panel
Whether you’re developing the wcplugin for your store or developing it for other merchants, user experience plays a major role. An immersive admin panel that will give the merchant an administrative experience when they use your extension is a must. Make sure to keep all the buttons clean with proper text and labels with a responsive design.
To provide an additional security layer check the roles of your current users and verify the task each user can execute. Doing so current_user_can( string $capability, mixed $args ) can be very helpful. The function lets you restrict the access of data for users that lack the required capabilities.
For example, you want to show a link created by your plugin only to the administrator.
By default, the ‘manage_links’ capability is only provided to a site administrator. The above snippet will limit the access for users with non-administrator roles.
7. Create A Woo Plugin With An Extensible Approach
It often happens developers come across a plugin that they want to customize but cannot find any way besides hacking the code. This happens because the developer of the plugin has hidden all the actions and filters for extending the plugin.
To make sure the plugin lives up to the standards of development, provide the actions and filters to other developers. It’ll allow the other coders to extend the capabilities of your plugin according to their goals.
With the help of this tutorial, you will learn to create a WooCommerce plugin, the goal is to live up to the standards of WordPress and WooCommerce. For an expert overview, you can check out the WordPress Plugin Handbook (Best Practices).
Now we’ll be beginning with the most awaited part of this article and that is step-by-step to create a WooCommerce plugin from scratch. In this tutorial, we’ll see:
- Prerequisites of WooCommerce plugin development
- WooCommerce plugin architecture
- Guide to creating a WooCommerce plugin.
8. Avoid Custom Database Tables
WordPress offers database tables for almost every aspect of development, therefore, it is highly recommended to avoid creating custom database tables. You can use WordPress’s database tables such as post types, options, and taxonomies.
9. Declaration Of WooCommerce Versions
Your plugin must be compatible with the latest versions of WordPress and WooCommerce. Similarly, it is also important to declare the supported versions in the plugin metadata. The following lines will help you in doing so:
Prerequisites To WooCommerce Plugin Development
The WooCommerce plugin development is a very straightforward process, but there are some pre-processes that have to be followed before we begin with coding. In clear words, you need some tools and software to create a WooCommerce plugin, like:
1. Setting Up WordPress Development Environment
To begin your development you need a local development stack. There are several tools available in the market for creating a locally hosted WordPress environment. Here are some tools that you can consider:
-
WordPress-specific Tools
- VVV: VVV is an open-source local development environment that focuses on WordPress. It is a highly configurable and robust cross-platform and is powered by Vagrant and Virtual Box.
- Wp-env: This is another tool for creating a local WordPress environment for building test plugins and themes. It is a command-line utility maintained by the WordPress community itself and you need Docker and JSON manifests to run custom WordPress environments.
- Local: Local is another great tool that allows you to create a local WordPress website in a breeze with just one click.
-
PHP-based Tools
- MAMP: MAMP is a local server environment for Windows and Mac users. One of the common reasons developers face issues while working on Mac-based local environments like MAMP is unexpected system shutdowns, which can interrupt plugin development and testing.

- WAMP: This is a Windows development environment that lets you perform seamless web development with Apache2, PHP, and a MySQL database.

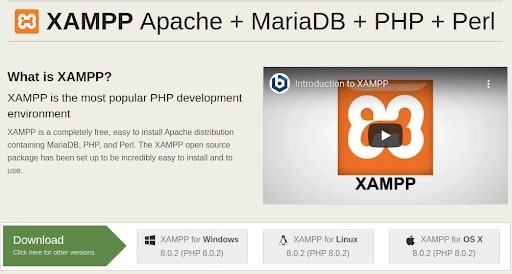
- XAMPP: XAMPP is one of the most popular PHP development tools and is completely free. It is an easy-to-install Apache distribution containing MariaDB, PHP, and Perl and is available for Windows, Linux, and OS X.

- MAMP: MAMP is a local server environment for Windows and Mac users. One of the common reasons developers face issues while working on Mac-based local environments like MAMP is unexpected system shutdowns, which can interrupt plugin development and testing.


Whether the plugin is tested locally or in cloud compute infrastructure, meeting WooCommerce and WordPress server requirements remains essential for stable development and deployment. which are:
- PHP version 7.3 or greater
- MySQL version 5.6 or greater or MariaDB version 10.0 or greater
- HTTPS support
2. Anatomization Of WordPress Development Environment
For a WordPress environment, the basic anatomy of the filesystem is relatively consistent though, it might differ for the development environments. At first glance, the number of files and directories in the environment might intimidate you but don’t worry as most of your time will be spent in the public_html directory.
Here are some key paths that you can familiarize yourself with:
wp-content/debug.log: The file where WordPress writes important messages like error messages or other debugging messages.wp-content/plugins/: The directory where the plugin folders live.wp-content/themes/: This is the directory where the WordPress theme folders live.
3. Install Development Version Of WooCommerce Core
To create a WooCommerce plugin, it’s highly recommended that you install a development version of the WooCommerce core.
Just trace the following steps:
-
Clone The WC Core
Firstly, clone the WC Core in the
wp-content/plugins/ directory. -
Activate The Required NODE Version
Next, you have to activate the required node version. If you don’t have the required version of Node, NVM will give you an alert and you can install it later.
-
Install The Dependencies
npm install && composer install -
Generate Compiled Assets
If you want to run WooCommerce on your server you’ve to generate some compiled assets. Skipping this step might end up in unwanted errors. Run the following script to compile the Javascript and CSS, required by WooCommerce to operate.
npm run build
4. Install Development Version Of WooCommerce Admin
For creating React-powered extensions you need access to some utilities and built-in scripts. The development version of the WooCommerce admin can give you this access so that you can create a React-powered WooCommerce plugin.
Just trace the following steps:
-
Clone the WC Admin
Firstly, you’ve to clone the WC admin into the
wp-content/plugins/directory. -
Activate The Required NODE Version
Similar to WooCommerce core you’ve to activate the required node version for WooCommerce Admin too.
While navigating between directories using the same shell keep in mind that the node version of WooCommerce Admin is different from that of WooCommerce Core. Therefore, it is highly recommended to activate the current node version with
nvmuse before running any commands within a cloned repository. -
Install The Dependencies
npm install && composer install -
Compile Asset Files
Compiling the unminified version of the asset files allows you to create a development version of WooCommerce admin. This is very helpful in debugging the extensions when they interact with the WC Admin.
Run the following command:
npm run devIf you run into any trouble you can check this article.
5. Install Development Version Of WooCommerce Blocks
Though this step is not compulsory, installing a development version of WooCommerce Blocks will allow you to work with the latest features of a standalone feature plugin. As a result, you can efficiently check the compatibility of your plugin with WooCommerce.
-
Clone The WC Blocks
The very first step is to clone the WC Blocks into the wp-content/plugins/. Run the following commands:
-
Activate The Required NODE Version
Make sure to activate the correct version of the Node by running the nvm use command while navigating between different directories within the same shell.
-
Install The Dependencies
Run the following command for installing dependencies:
npm install && composer install -
Build The Assets
Run the following command to compile and minify the Javascript and CSS at the same time from the
/assetsdirectory.npm run build
These were some important WooCommerce sibling extensions that needed to be installed along with WooCommerce. After you’re done with the prerequisites you can start setting up your local WooCommerce store and upload sample products.
6. Curation Of Proper Documentation
Consider this prerequisite to be as important as developing the WooCommerce plugin. Curating the documentation of the plugin that you have developed is crucial. You should make sure that it is easy to read, understand, and comprehend. It is advised to use layman’s language and to make it as non-technical as possible.
Break down the working of the plugin into different sections, and those sections into further sub-sections. Use as many screenshots as possible to explain every setting of the plugin.
Check this resource to take reference for curating the perfect documentation.
WooCommerce Plugin Architecture
Before we jump into the process of how to create a WooCommerce plugin let’s see the architectural structure of a plugin.
A WooCommerce extension is made up of a combination of PHP and JavaScript that creates a seamless experience for a merchant and the shoppers. All the features and functionality of your WooCommerce extension can be found in the NodeJS ecosystem.
Apart from the main PHP file that all WordPress plugins contain, a WooCommerce extension typically contains some additional files that encapsulate the server-side functionality.
When you run the built-in extension generator (create-wc-extension) you’ll see a pattern that defines the hierarchical structure of a WooCommerce plugin.
Breakdown Of File Structure
Below is the breakdown of the files that you get after running the extension generator.
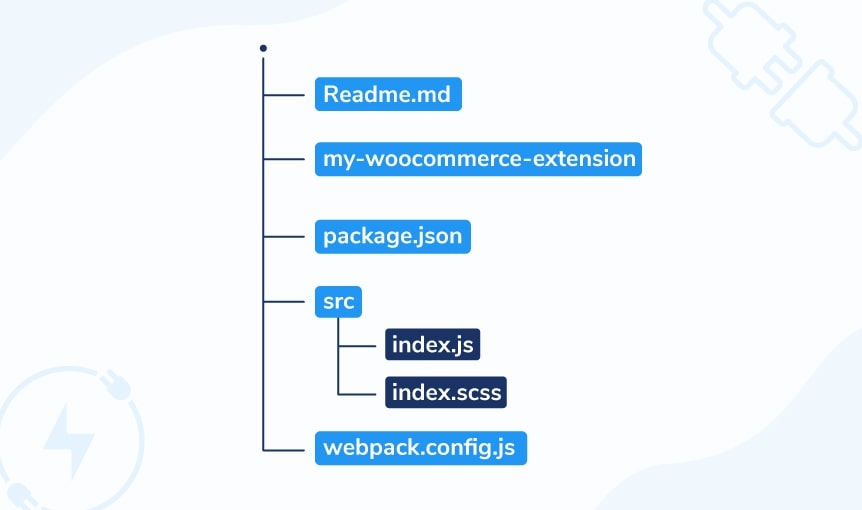
Let’s see the purpose of these files in detail:
1. README.md
This file is a high-level representation of your extension. It is this file that makes it for people to use and extend your WooCommerce plugin. Keep in mind that README.md is different from README.txt which is required by the WordPress.org plugin directory.
2. [your-extension-name].php
This is your extension’s main PHP file. It is within this file where the developer is likely to include the codes that hook the plugin into WordPress and WooCommerce.
3. package.json
This file stores:
- Configuration settings for tools.
- Alias for common scripts.
- Extension’s metadata
- List of dependencies
package.json is a manifest file used by Node to serve many different purposes. With the help of this file, you can streamline a variety of scripts with a bundle of dependencies. As a result, it ensures that the plugin conforms to the standards of WordPress and WooCommerce plugin development.
Here’s an example of the package.json file:
4. The src/ Folder
The folder includes files that shape the client-side behavior of the plugin i.e. the appearance of your WooCommerce extension. The src/ folders contain the JavaScript and SCSS files that are eventually transpired and minified into browser-ready assets. Later, the extension can register and enqueue these assets in WordPress.
When you use the WooCommerce extension generator, there are 2 starters:
index.jsindex.scss
5. webpack.config.js
webpack.config.js is a configuration file for Webpack that does the preprocessing and bundling of JavaScript in your project. The purpose is to minify the JavaScripts and make them ready to serve a browser.
If you use the default WooCommerce extension generator, the initial Webpack configuration may look something like this:
This was the complete anatomy of a WooCommerce plugin and now we’ll learn how to create a custom WooCommerce extension from scratch in the next part of this article.
Guide To Create A WooCommerce Plugin From Scratch
Before we begin with this guide, ensure that your goal is to create an extension that provides a first-class experience for merchants and shoppers. WooCommerce extensions use a combination of PHP and modern Javascript, popularly known as the hybrid development approach.
Now let’s cut to the chase, and begin the development of your Woo extension.
Step 1: Defining Important Data In The Main PHP File
The WooCommerce extension’s main PHP file is a bootstrapping file that encapsulates important metadata about your plugin. WordPress and WooCommerce use the metadata for various ecosystem integration processes. To say, it serves as a primary entry point for your plugin’s functionality.
WooCommerce Plugin MetaData
There’s a complete list of header requirements by WordPress that a plugin must adhere but there are some additional considerations for WooCommerce extension:
- The
AuthorandDeveloperfields are required and it is recommended that you use your name or company name. - Include the link to your official webpage in the
Developer URI. - The
Plugin URIfield includes the URL of the extension’s product page in the WooCommerce marketplace. - Add the
Woofield to facilitate the update process with an appropriate value. As a plugin vendor, you can find this snippet by navigating toExtensions > All Extensions.
Here is an example of header content for a WooCommerce extension:
Prevent Execution Via Direct Browser Access
It is highly recommended to include a conditional statement at the top that checks for WordPress’s ABSPATH constant:
This check prevents the execution of your PHP files via direct browser execution. Consequently, they will be only executed from within the WordPress application environment.
Step 2: WooCommerce Plugin Lifecycle Management
A WooCommerce plugin has three lifecycle areas that need to be managed, namely:
- Activation
- Execution
- Deactivation
Since your main PHP file is the primary point of coupling between the extension and WordPress, it should be considered a hub for managing the plugin lifecycle.
Let’s see the management of each lifecycle area in detail:
Handling Activation And Deactivation:
In the WooCommerce extension are created in the main PHP file to serve as activation and deactivation hooks. While developing a WooCommerce plugin you can register these hooks with WordPress with the help of the applicable registration function:
Ensure Proper Organization Of Codes
There are numerous ways in which you can organize your extension code. Here are some basic principles you can consider for optimizing the organization of your code lines:
- Use namespacing and prefixing to avoid conflicts. (check out the previous section of this article for namespacing)
- Encapsulate the functionality within classes.
- Keep a check on declarations, assignments, and implementations.
Step 3: Encapsulating Different Functionality Of WooCommerce Using Class
As mentioned above encapsulation of different functionalities within classes when creating a WooCommerce plugin is a recommended practice. To say, it is a measure to promote interoperability as a result, making it easier to maintain and debug the code. After coding, you need to test your plugin thoroughly and ensure it adheres to WordPress and WooCommerce standards before releasing it to users. If you’re also working with Magento, securing reliable Magento Hosting is essential for optimal performance and scalability.
There are many different classes to shoulder some piece of functionality of your extension. But you should at least define a central class that can handle the setup, initialization, and management of a single instance of itself.
The Singleton Approach
In the world of software engineering, the singleton approach is a software design pattern that restricts the instantiation of a class to one “single” instance.
The singleton approach is a great way to encapsulate all the functionality within a single class. Here’s an example of how you can implement the approach in PHP.
In this example, you’ll see an empty constructor that in the real world handles some really important tasks like:
- Keep a check on the active installation of WooCommerce and other sibling dependencies.
- Call a setup method that loads the files on which your class is dependent.
- Make your class and dependencies ready to go by calling the initialization method.
Step 4: Common WooCommerce Plugin Functionalities
There are some actions that a WooCommerce plugin should perform. The actions include the following:
1. Verify If WooCommerce Is Active
If your plugin is installed by a user in a WordPress environment, it should only work when the admin has installed and activated WooCommerce too. To ensure this wrap the PHP class around the following snippet:
In the above snippet, we’ve used the WC_Dynamic_Discount class with an empty constructor as a placeholder. In short, the above snippet will ensure that your plugin code is executed only when the website admin has activated WooCommerce.
2. Capture Discount
One of the important aspects of creating a WooCommerce plugin from scratch is to capture and apply discounts to products. I’ll share with you how to capture discounts and apply them to products.
To capture product discounts you need to do two important actions:
- show_discount: This action will display the discount associated with the product to the users.
- save_discount: The save_discount will save the custom profile value of the user who is getting the discount.
Next, we’ve to define the functions show_discount and save_discount use get_user_meta() to get all the details of the customer.
3. Apply Discounts
Once the discounts have been captured by your plugin it has to be applied to the products and reduce the price by a specific predefined percentage or value. So here’s what you’ve to do:
- Firstly, you have to use the woocommerce_product_get_price filter. Add this to the constructor later and define the following function:
- In the above snippet, the show_dynamic_price function collects the discount value of the customer and calculates the discounted price.
Step 5: Handling Execution, Activation, Deactivation, Uninstallation
Once you’ve created your WooCommerce plugin and it is activated and initialized, the next step is to manage the functionality of your extension. I might not be able to discuss the implementation of specific functionality in this guide but I will share with you some best practices for handling execution, deactivation, and uninstallation.
Execution
- Always remember that merchants and shoppers use an extension by interacting with WooCommerce using web requests. Therefore, it is very helpful to anchor your extension to one or more of the critical flows.
- Try to keep the business logic (for the admin) and the presentation logic (for the shoppers) different. You can maintain separate classes for the back-end and front-end rendering.
- Refrain from building lengthy functions and bloated classes. Try to break the functionality wherever possible and delegate responsibility to dedicated classes.
Deactivation
When a merchant deactivates your plugin you have to do a cleanup in the deactivation hookup, register_deactivation_hook(). This process includes WordPress-related deactivation tasks and WooCommerce-related cleanup, like:
- Removing scheduled actions.
- Discard Admin Notes
- Admin tasks removal
Uninstallation
A plugin is considered uninstalled when a user deactivates the plugin in the WordPress admin panel and then clicks the uninstall or delete link.
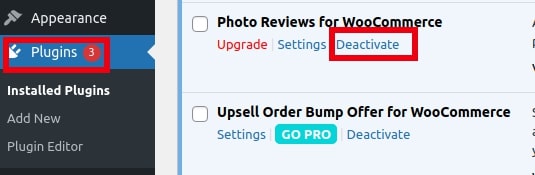
While many new developers make the mistake of using the deactivation hook for uninstallation, there’s a huge difference between a Woo plugin being deactivated and uninstalled. Here’s a table from the WordPress Developer handbook (Uninstall) that shows the exact difference:
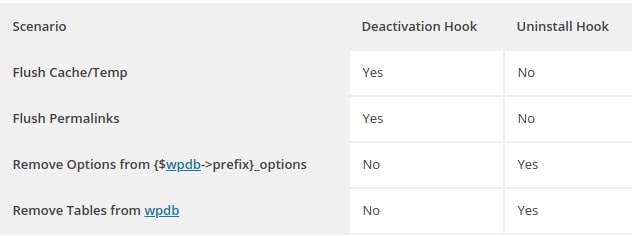
You can reverse everything that has been created when a merchant deactivates but it is advisable to not do so. Instead, it is recommended to reserve the behavior for uninstallation.
Step 6: End Result
Finally, you’ve put everything together and your plugin is ready. The main plugin after the complete development will look something like this:
Step 7: Publishing the WooCommerce Plugin
Now that you have your WooCommerce plugin ready and all set, it is time to publish it. Take a look at the steps mentioned below,
- Choose A Platform For Publishing: Once the plugin is ready, you can now pick a platform GitHub, WordPress plugin repository, and CodeCanyon are a few places where you can publish your WooCommerce plugin. Your pick should align with the goals and objectives of your current business.
- Preparation For The Publish: During this time you make the final finishing touches i.e. curating the documentation and the demo content. Checking the code thoroughly, ensuring that it is secure to use.
- Submission: This step involves you submitting the plugin to the platform that you have decided to proceed with. It is very crucial to read and follow to submission rules carefully. In the following section, we will also discuss the 5 best marketplaces to sell WooCommerce plugins. This will help you get a clearer picture of this process.
- Promotions: After the WooCommerce plugin has been listed on the platform, you can start with the promotions on channels like forum, quora, medium, and other social media platforms like Facebook, Twitter, and LinkedIn.
5 Best Marketplaces To Sell WooCommerce Plugin
Once you’ve developed the plugin you need the right amount of audience that will install your Woo plugin to their WordPress websites. Now you can get started by creating your website and doing marketing to reach your target audience.
The next best alternative is to launch your plugin in an established marketplace that has an audience to give your audience the exposure it needs.
1. WordPress Plugin Directory
The first place is WordPress itself. So the WordPress Plugin Directory isn’t a marketplace because you cannot sell your plugin instead it is available for free to your users.
If the plugins are hosted for free then why get them listed on WordPress?
The biggest reason is trustworthiness. The first preference of the user is the WordPress-hosted resources because firstly, it’s free and secondly, it’s offered by WordPress. Also, you get access to a great number of tools and services for free such as plugin statistics (downloads and active installs), support forum, changelog, and more.
The prominent benefits of listing a plugin on WordPress.org are:
- A centralized place for users to find plugins developed by you to leave feedback.
- The huge audience allows you to collect honest reviews from WordPress enthusiasts.
- If you’ve recently launched a plugin, hosting it on WordPress can be a wise choice. Your plugin will get a very high exposure from the vast WP community.
- WordPress is a free community and by publishing your plugin you can make a valuable contribution to this community.
Check Out WP Swings And Connect With Us On WordPress.org!
2. CodeCanyon

CodeCanyon is a popular marketplace from the house of Envato. This is a place where you can sell your plugin for a fair price, unlike WordPress.org.
The best part is you don’t have to go through the hassle of building a freemium version of your plugin as in the case of the WordPress repository. You can reach a wide audience of WordPress enthusiasts immediately and skip the hardest part of selling a plugin.
Click here to understand the Envato Author Fee Structure.
Checkout Our WooCommerce Solutions On CodeCanyon
3. WooCommerce

After WordPress, the WooCommerce marketplace is the trusted platform for downloading themes, resources, and plugins. You’ll find extensions that cover every aspect of online selling.
There are hundreds and thousands of free and paid Woo extensions across all your logistical, technical, and marketing needs for merchants. By selling your plugin on the WooCommerce marketplace you can earn up to 70% of the Product Net Revenue.
The biggest advantage of selling your extension on WooCommerce is that you can build your reach among individuals who are exclusive WooCommerce owners.
While other marketplaces have extensions that act as tools for enhancing the functionality of the entire website including WooCommerce, the WooCommerce Marketplace has exclusive solutions for creating eCommerce stores
Don’t Forget To Check WP Swings On WooCommerce!!
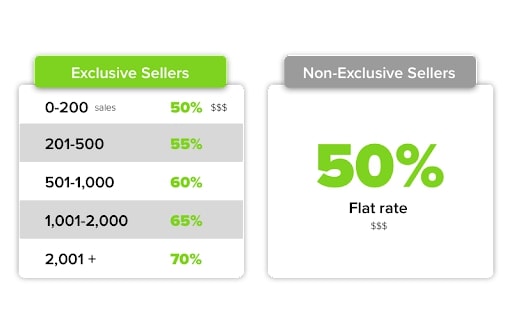
4. Mojo Marketplace

The Mojo Marketplace is an underrated but great option for publishing and selling WordPress plugins. It integrates directly with hosting platforms which means users will find your plugin right when they create their site.
Mojo Marketplace is a venture that was introduced as a combined effort of Mojo Themes and Mojo Code. By selling your plugin extension on this platform you can earn somewhere around 50% to 70% as an exclusive seller and a flat 50% as a non-exclusive seller.
Mojo Commissions
5. Codester
Codester is a marketplace where you get ready-to-use web development assets. There are more than 15,000 resources available created by a global community of developers and designers.
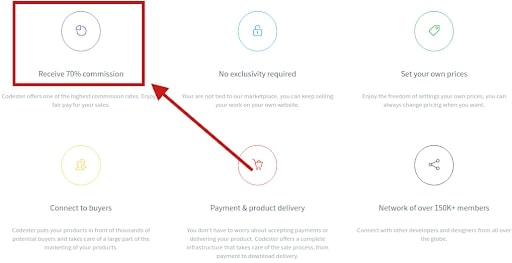
The marketplace is not limited to just WooCoomerce and WordPress plugins but they also have scripts, apps, and graphics for sale as well. By selling your work on Codester you receive a 70% commission.
Ready To Create A WooCommerce Plugin?
With this, we come to the end of our guide to create a Woo plugin from scratch. If you’re familiar with WordPress/WooCommerce development this guide is nothing new for you. But if you’re new to development or curious like me to know how WooCommerce plugins work technically, this article is for you.
While writing this guide I could only understand to create a WooCommerce plugin one has to:
- Be well-versed with the multitude of WooCommerce actions and filters.
- Learn to add the correct functionality and encapsulate it in a class to optimize the code.
Drop in your views on this guide in the comment section. Also, do let me know how you plan to contribute to the eCommerce community by developing a custom plugin.


I am trying to follow the blog and get stuck in step 3. There is a failure in installing `husky` and I don’t have composer, not sure which package to install to get it. I am running ubuntu 18. Thanks,
For installing husky it is very important to have a dependency management tool, therefore you need to install the composer.
Follow the following steps for installing the composer:
Step 1: Prerequisites
Ubuntu 18.04 server
A sudo non-root user and
Firewall.
Step 2: Install The Dependencies
Update the package manager:
After updating the package manager run the following command:
Step 3: Downloading & Installing The Composer
Make sure you’re in your home directory, then retrieve the installer using
curl:Next, verify that the installer matches the SHA-384 hash for the latest installer found on the Composer Public Keys / Signatures page.
For more details, you can refer to this community post by Digital Ocean.