WooCommerce product categories, tags, and attributes will be an easy road for you after this article. An online store helps you increase your brand name and awareness globally, seven days a week, with no time boundations and improves client service through greater flexibility. Moreover an online venture with WooCommerce is probably the best way to start your own eCommerce store.
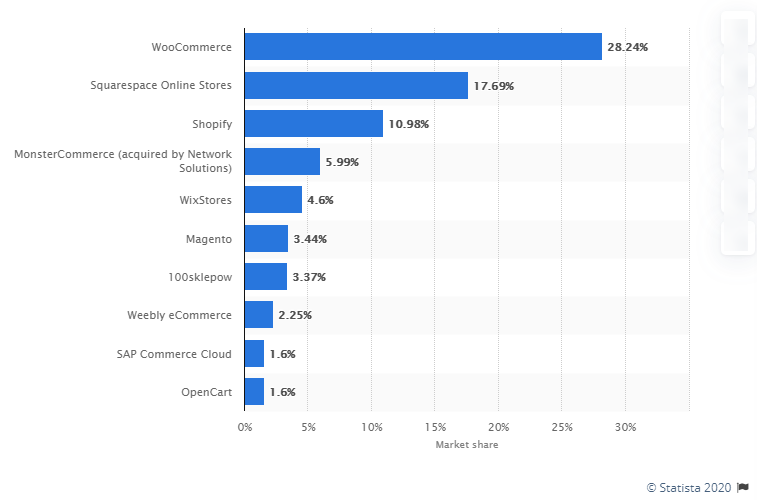
Hence, evidently, it’s one of the most popular choices because it is the worldwide leading eCommerce platform in 2020, with a market share of 28.24 percent.
Best Platform For Service-Based Businesses
Since you are here on this article, let me assume that you have already created and set up your WooCommerce store. As a result, you know about the settings and their configurations, the product types you can sell on WooCommerce, and the payment options as well.
But, even if you are not a WooCommerce store owner yet, this article will make you want to have one!
Additionally, every WooCommerce store owner wants to improve its user experience. Therefore, imagine customers coming to find a product in your store and leaving without a purchase.
Doesn’t sound like a problem unless I tell you, the particular product they wanted was present in your store, and the visitors left without even checking them out. That would be so not fair because your WooCommerce store deserves all those conversions.
Setup Your Online Store With WooCommerce
And probably because they couldn’t even find anything near to the product they desired, they are never coming to you again. Hence, categorization of your WooCommerce products is all you need for a better customer experience and all those ever lost conversions.
Additionally it becomes even more easier with WooCommerce because it offers a great deal of customization.
WooCommerce product category helps you cover all the products of your eCommerce store. So, it is a great way to de-clutter your WooCommerce store and provide navigation to your customers, making it a perfectly organized guide.
In This Article We Will Discuss:
The product tags, attributes, and product categories will surely help you in the smart management of your WooCommerce Store. So let’s get started on every aspect related to the WooCommerce product category.
WooCommerce Product Category
WooCommerce product category is the primary method to group identical products. So, this way you may group a set of products and filter them under one space.
For example, you can create the following WooCommerce product category and quickly add a list of related products to it:
| WooCommerce Product Category | Types Of Products | |
| 1. | Clothing | Shirts, Hoodies, Pants, Dresses, Tunics, Jackets, Jumpsuits, Scarfs, Jeans, Tracksuits, Leggings, etc. |
| 2. | Accessories | Sunglasses, Diamond rings, Hair bands, Caps, Watches, Bags, Purses, Shoes, Perfumes, Lipstick, etc. |
| 3. | Furniture | Sofa sets, Dining Tables, Chairs, Cupboards, etc. |
| 4. | Electronics | TV, Fridge, Stereo System, Ovens, Air purifiers, Steamer, Straightener, Computers, Air Conditioners, etc. |
Not just this, the WooCommerce product category allows you to even create sub-categories for further types of products in a single category. You could make them based on color, brands, gender, occasions, etc.
So, Here Are Examples For Sub-Categories:
| WooCommerce Product Category | WooCommerce Product Sub-category | |
| 1. | Clothing | Woolens, Summer-wear, kids’ clothing, Party wear, Ethnic wear, Beachwear, Gowns, Formals, Sports wear, Night suits, etc. |
| 2. | Footwear | Boots, Sports Shoes, Sandals, Heels, running shoes, Slippers, etc. |
| 3. | Electronics | Kitchen gadgets, Personal care gadgets, Mobile phones, Music systems, Laptops, Storage devices, Wearable devices, Headphones, Cameras, Gaming devices, etc. |
So, here arises the question-
Why Do We Use WooCommerce Product Categories?
If we count reasons to categorize your WooCommerce products, you may see below:
- Users easily find and scan products
- Groups your products based on properties
- Enables you to customize filters for products
- Increases customer experience, which gives you better customer feedback
- Optimizes structure of your WooCommerce store
- Provides better SERP(search engine result pages) position
- Essential for the long-term running of your WooCommerce store
Adding/Creating/Editing WooCommerce Product Category
There are 2 ways to add a new category, or I’d say 1.5 ways because the second one is as short as a bite.
You can manage WooCommerce product categories from the left panel of your WordPress website backend. The steps to create WooCommerce product categories are:
- Go to your Dashboard.
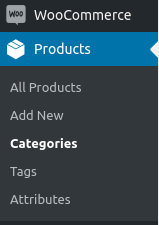
- Navigate to Products > Categories.
- Here you can add, delete, or edit your WooCommerce product category.
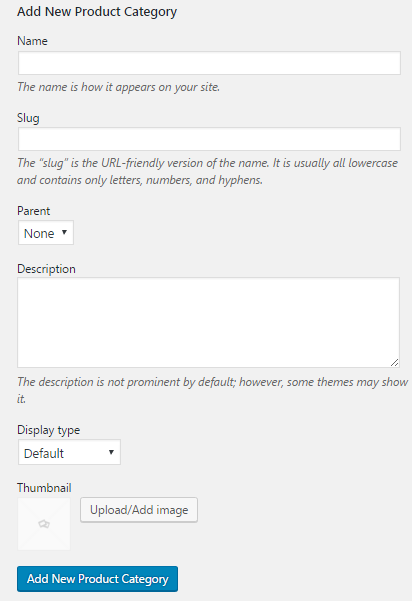
Now, you can add the required details. You will notice the following fields:
Name: You can add the desired name to your WooCommerce product category here. This name will be visible to the shoppers. For example, clothes.
Slug: This may be an optional field. It determines the URL of your product category page. If you customize this field, remember it should only contain hyphens, numbers, and lowercase letters. In the case of clothes, it will translate to www.yoursite.com/product-category/clothes.
Parent: If you are creating a new category, leave it as none. In case you are creating a sub-category, you may select the suitable parent WooCommerce product category under which this sub-category falls. For example, formal and informal wear will be a sub-category under clothing.
Description: Some themes display the description by default. You can add detailed information about your WooCommerce product category here.
Display Type: This is where you decide what you want to show your visitors as soon as they enter your store’s landing page. It is a drop-down menu with four options:
- Standard will use the default of your theme.
- Subcategories directly display subcategories.
- Products will display all your products.
- Both will display products below the sub-categories together.
Upload/Add Image: With this option, you can set thumbnails for your WooCommerce product category or sub-category. There are pages in some themes that display WooCommerce product category images.
Add New Product Category: All you now have to do is click the blue button, “Add New Product Category” and it will create a new WooCommerce product category.
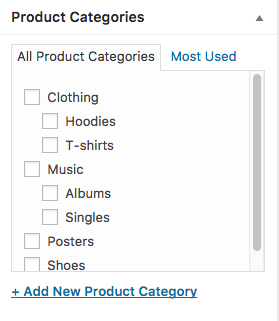
The category appears on the adjacent window where you can see the listing of all WooCommerce product categories on the Add Product page.
WooCommerce Product Development Services
The other way to add a new WooCommerce product category is :
- Go to Products > Add Product
When adding a new product, you can see a panel on the right where you can directly select “Add New Product Category” and create as many new WooCommerce product categories as you fancy. And this was the short bite.
Note: There is a default category in the name of ‘Uncategorized’ that contains a few of your products because they have not been assigned with any WooCommerce product category. Also, it cannot be deleted.
Re-ordering WooCommerce Product Category
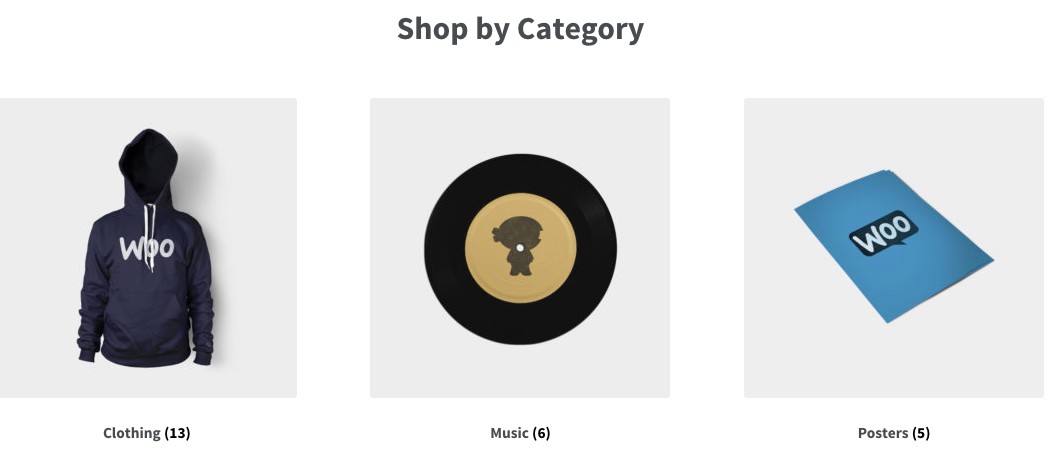
The Storefront homepage template, by default, displays the WooCommerce product category images on its homepage template.
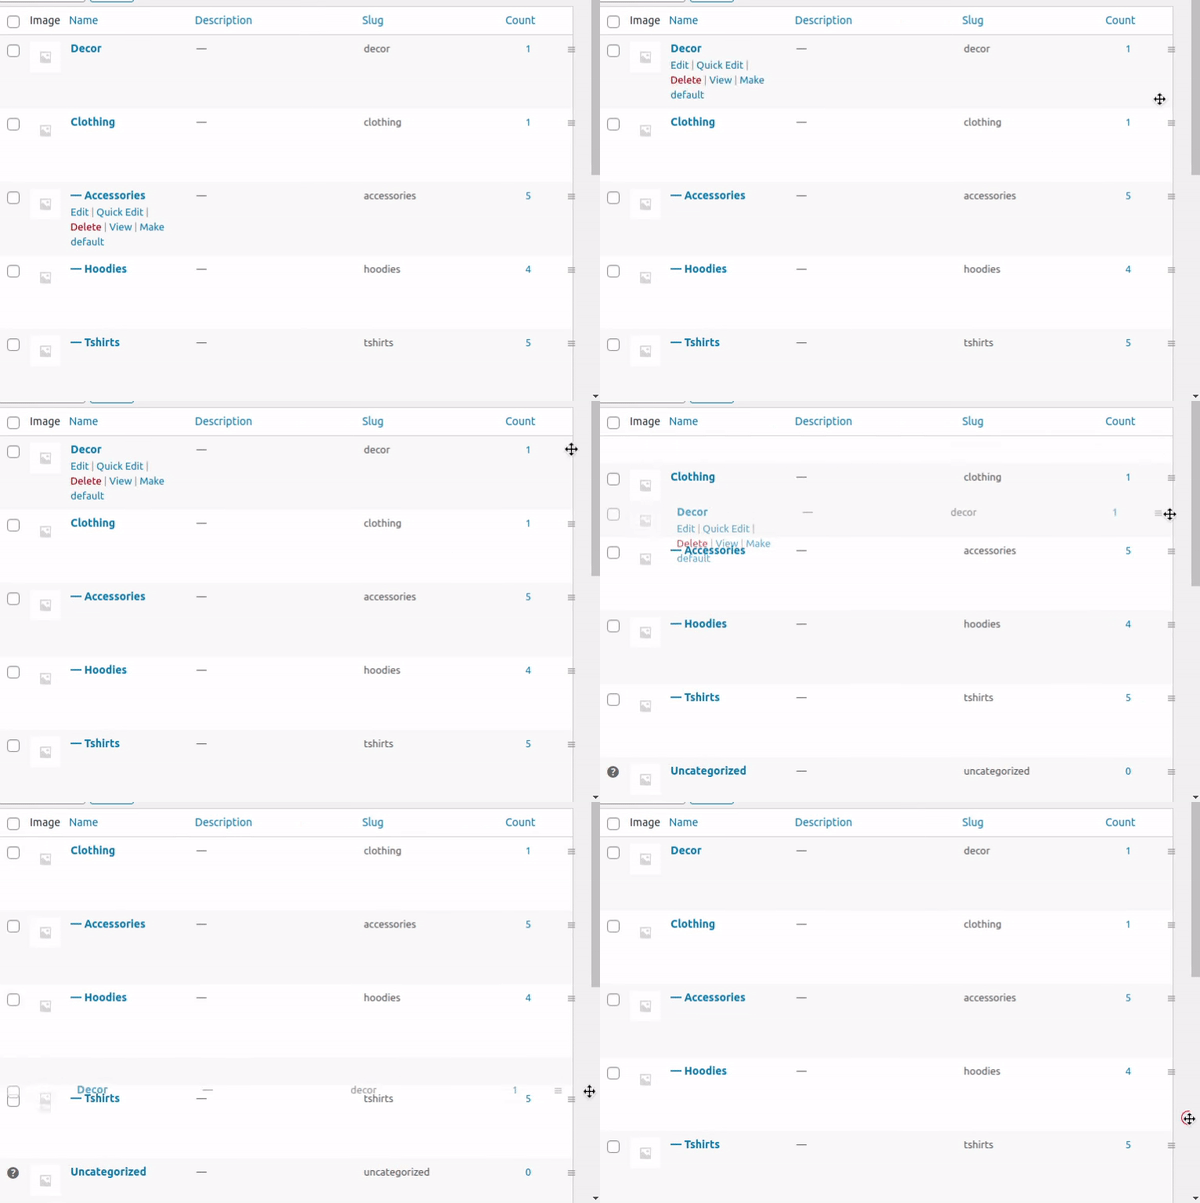
And, this is also the order by default for listed categories on the frontend. You can reorder your WooCommerce product categories by a simple drag-and-drop method. The list has both category/subcategory, and widgets. Let’s see how.
The steps to re-order WooCommerce category are:
- Go to Dashboard > Products > Categories
- List of all WooCommerce product categories will appear on the right
- Locate the = icon on the end of the category name, drag and sort them accordingly
WooCommerce Product Tags
The WooCommerce Product tags are yet another way to group and relate the products to each other after the WooCommerce product category. But unlike WooCommerce or product sub-categories, it does not comprise sub-tags.
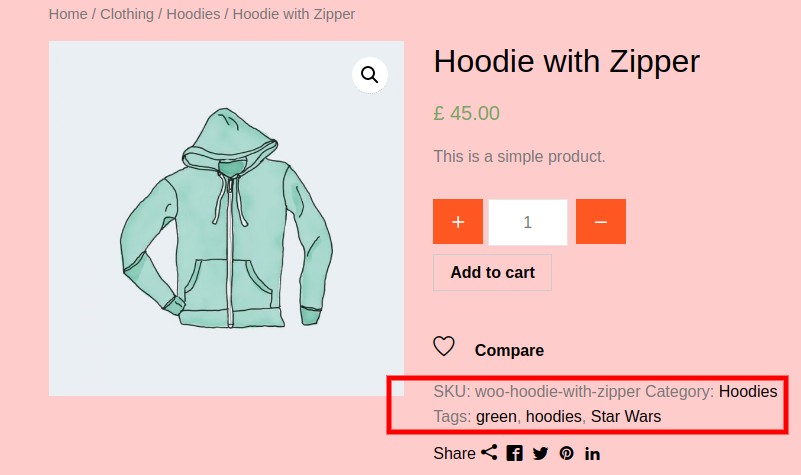
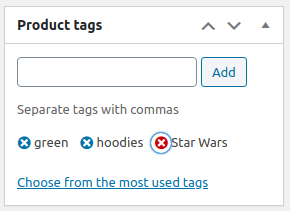
When you add tags, you give an opportunity to your customers to find their desired product. For example, if you sell clothes and you have a lot of Marvel, Star Wars, or any other themed prints, you can create tags for them and make it smooth for those interested in buying them.
In this way, they get directed to all the merchandise associated with such tags.
Not just that. Similar to adding tags to your WordPress website blogs, you can help your WooCommerce products rank in Google through WooCommerce product tags. Hence, tags work as a marvelous source for your WooCommerce product internal links multiplier.
Adding/Creating/Editing WooCommerce Product Tags
Adding a WooCommerce product tag is similar to adding the WooCommerce product category.
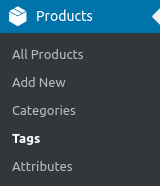
- Go to Products > Tags
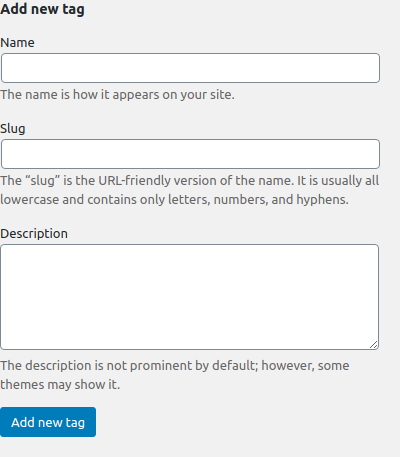
When you select tags, you will find a page similar to that of the WooCommerce product category. The fields are also similar.
Fill in the following details:
Name: Here you will add the name of the tag you want to create.
Slug: You may also add this field for URL friendly versions.
Description: Describe your tag. This is again optional as it is not displayed by all themes.
Click the blue button titled “Add new tag” and you have your tag created.
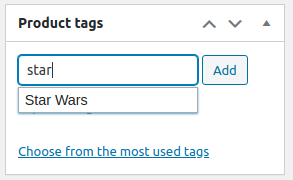
- Go to Products > Add Products. You may check your tags on the right panel, below the Product Categories.
You can add up to three tags to your WooCommerce products. Use commas to separate WooCommerce product tags. So, you have your product tags created neatly.
Removing WooCommerce Product Tags
Apart from adding WooCommerce product tags, you might want to remove these over time. For that you can follow these steps:
- Go to Products > All Products > Edit Product
- Locate the meta box of WooCommerce product tags on that page.
When you hover over the already mentioned tags, you will see a cross sign. Clicking on it will delete the selected tag.
WooCommerce Product Attributes
What are WooCommerce product attributes?
The WooCommerce product attribute is another way to group your WooCommerce products. These define some extra pieces of features of your WooCommerce products.
These additional details will enhance the browsing experience of your customers and give a clearer idea of your WooCommerce products.
For example, a dress could have the following attributes:
Color: Green, Black, Purple, Red
Size: L, XL, XXL, S, M, XS
Material: Cotton, Linen, Silk, Georgette
For WooCommerce, this data type has two uses-
1. Via WooCommerce Widget
With “Filter Products by Attribute”, you can select a particular attribute. Also, when you add this widget to your WooCommerce store’s sidebar, your WooCommerce customers can filter products based on those attributes.
2. Via Variable Products
Define attributes for the products to create WooCommerce variable products. The WooCommerce product attributes will help in differentiating between variations of your WooCommerce products.
Two logical WooCommerce product attributes for clothing shall definitely be size and colour. This will enable customers to search for the desired colour in their respective sizes.
Adding/Creating/Editing WooCommerce Product Attributes
How to add WooCommerce product attributes?
From your WordPress admin dashboard:
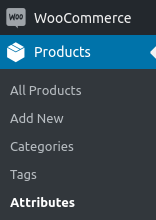
- Go to Products > Attributes
Complete the fields in the form that appear.
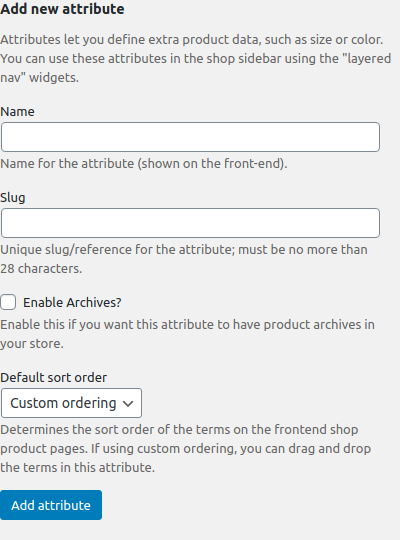
Slug: That will be the URL-friendly version of your product tag name.
Enable Archives: When you enable archives, you can easily view all the products with similar attributes on one page.
For example, if ‘green’ is one attribute of your product under color, and you have enabled archives, then you may add http://yourstore.com/pa_color/green/ to your menu for displaying only green clothes. (pa stands for product attribute)
Default Sort Order: Here you will find options in a drop-down menu:
- With Custom ordering, while configuring the terms, you can sort tags by dragging and dropping terms in the list.
- If values are numbers, select ‘Name (numeric)’. It will sort based on numeric values.
- ‘Name’ will sort terms alphabetically.
- ‘Term ID’ refers to the unique name of the products in the term table.
Now click the blue ‘Add Attribute’ button and the attributes will be created. The table on the right will show the attributes but attribute values will not be added.
Adding terms to WooCommerce product attributes:
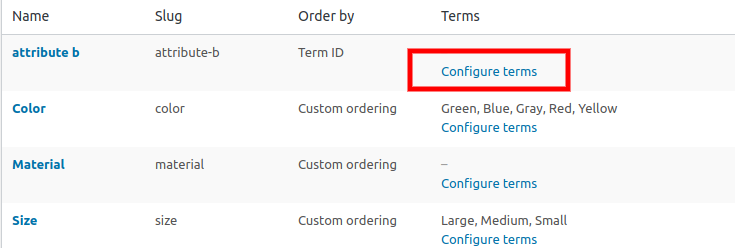
- Go to Products > Attributes > Configure Terms
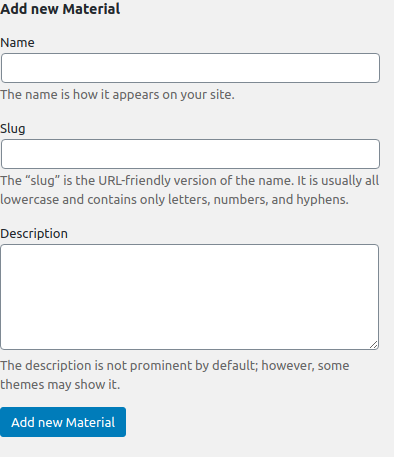
You can edit and add the terms of your WooCommerce product attributes here. You will find similar columns to fill as you have seen before.
Click “Add New [Attribute_Name]” and create. You can add multiple attribute terms and values by repeating the process.
Adding Global WooCommerce Attributes To Products
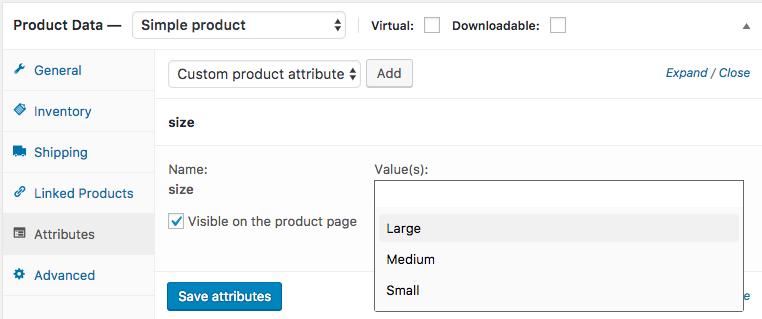
Adding created attributes to your products:
- Go to Products > Add Product
- Find Attributes tab in Product Data.
Here, you will find all the WooCommerce product attributes and select one from the drop-down menu.
- Click Add.
You may also customize WooCommerce product attributes for a particular product in the same way.
Here We Are!
I hope all your WooCommerce product categories, tags, and attributes related doubts must have vanished by now. These will undoubtedly assist you in organizing your WooCommerce products. As a result, your WooCommerce store will undoubtedly be easier to access and organize.



Thanks for this wonderful post. I was knowing a bit about Woo-commerce but you have explained it in detail. I am planning to create an Affiliate marketing website using this.
Will it be good?
You are most welcome. And as for your question, YES! WooCommerce is an excellent platform for affiliate marketing. Combined with a content management system as smooth as WordPress, WooCommerce can help you achieve your goals.
It even has many free affiliate marketing plugins to help you in beginning your process. All our blogs are WooCommerce oriented inside out, so for a complete and extended understanding you can go through them too. Moreover, now that you are thinking about it, why not check out our MakeWebBetter affiliate program.